Browse help
Your PDF documents (invoices, quotes, credit notes, purchase orders, delivery notes and receipts) carry your identity: logo, name, contact details and legal mentions. This page explains how to set them up, from the simplest (the logo size) to the most advanced (a complete letterhead designed by your graphic designer).
Everything is in Paramètres → Modèle de facture (Settings → Invoice template), in four tabs: Modèles (Templates), Identité visuelle (Visual identity), Papier à en-tête (Letterhead) and Options du document (Document options). On a large screen, a live preview of the document appears on the right and updates with every change, even before saving.
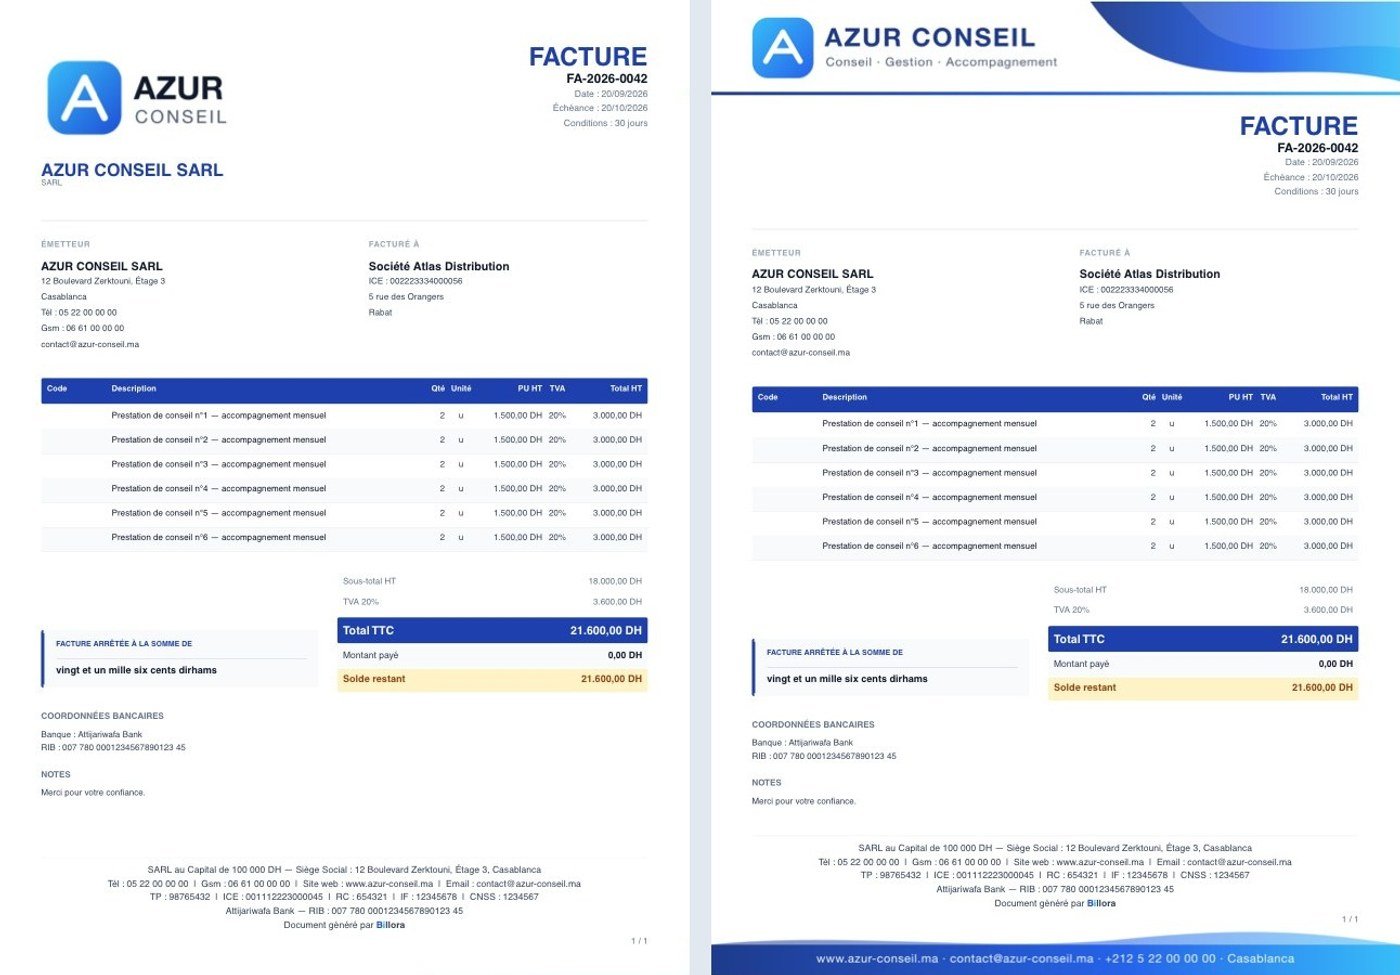 Left: the default invoice, with your logo. Right: the same invoice with a header and footer banner (« Azur Conseil » template).
1. The logo and the company name
In the Identité visuelle tab, the Logo et nom sur les documents (Logo and name on documents) card. These settings are open to all subscriptions.
- Afficher mon logo sur les documents (Show my logo on documents): untick the box to not print the logo (the company name itself is still printed). With no logo saved, it is greyed out: upload your logo first, just above.
- Taille du logo (Logo size): Petit (Small), Moyen (Medium, default), Grand (Large) or Très grand (Very large). The proportions of your logo are always preserved.
- Position du logo (Logo position): left, centre or right of the header.
- Taille du nom de l'entreprise (Company name size): four steps, as for the logo.
- Position du nom (Name position): Auto (on the left, or with the title when it is overlaid on a banner), Gauche (Left), Centre or Droite (Right).
- Position du titre, du numéro et des dates (Position of the title, number and dates): the "INVOICE, number, dates" block can go on the left, centre or right.
Several elements placed in the same area stack up. If the whole is too wide for a single row, the logo moves to a separate line rather than overflowing.
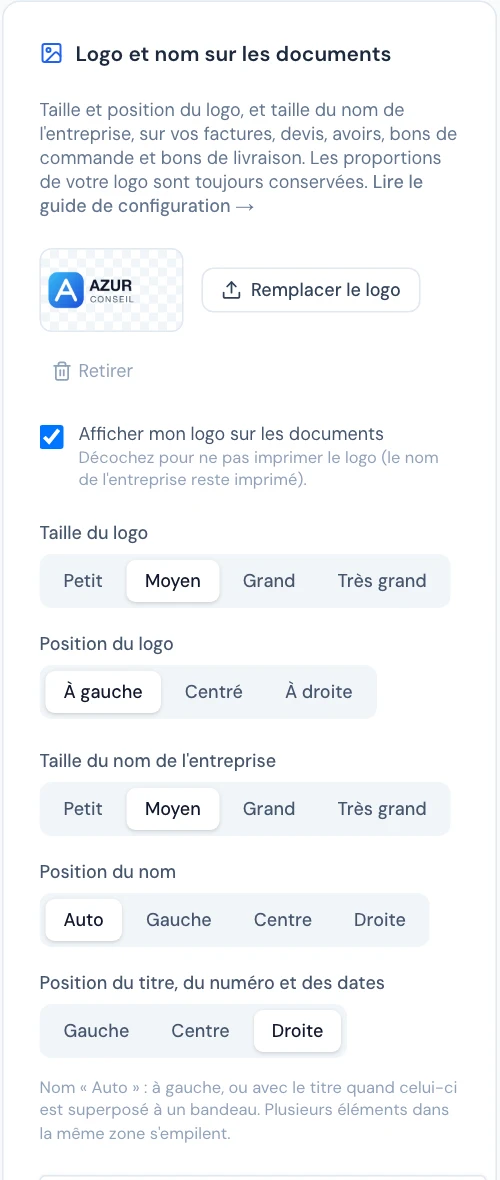 The « Logo et nom sur les documents » (Logo and name on documents) card: logo upload, « Afficher mon logo » box, sizes and positions.
The logo is uploaded directly in this card (Téléverser mon logo (Upload my logo) or Remplacer le logo (Replace the logo) button); it is saved with the rest of the settings, when you click Enregistrer (Save). Prefer a PNG with a transparent background, at least 800 px wide.
2. The footer
By default, Billora prints an automatic footer at the bottom of each page: legal form and share capital, registered office, contact details, tax identifiers (ICE, IF, RC, TP, CNSS) and bank details. It is set in 8 points, in dark grey, with a safety margin from the edge of the page, so that it stays readable when printed.
To customise it: Paramètres → Entreprise → Valeurs par défaut des documents (Settings → Company → Document defaults), Aperçu du pied de page (Footer preview) block, Modifier (Edit) button. You can format the text: bold, italic, underline, left, centre or right alignment, lists. Empty the text to go back to the automatic footer.
If you replace the automatic footer with your own text, remember to include your identifiers (ICE, IF, RC, TP) and your bank details. The custom footer is available depending on your subscription; without it, the automatic footer is always printed.
3. Letterhead paper (banners and page background)
The Papier à en-tête (Letterhead) tab. It lets your PDFs carry a complete visual identity, with images supplied by your graphic designer. This feature depends on your subscription: if it is not included, the tab shows the plan from which it is available.
Step 1 — Your images
| Image | Where it is printed | Recommended format |
|---|---|---|
| Header banner (Bandeau d'en-tête) | At the top of the first page (or of all pages, see below) | Wide and short: about 2480 × 300 px |
| Footer banner (Bandeau de pied de page) | At the bottom of each page | Wide and short: 2480 × 170 to 200 px |
| A4 background image (Image de fond A4) | Behind each page | Full page: 2480 × 3508 px, transparent PNG or JPEG |
- Accepted formats: PNG or JPEG, 12 MB maximum on upload.
- The banner must be wide and short (proportions from 2.5 to 20 times wider than tall); a background image must have the proportions of an A4 page.
- Minimum width: 900 px, otherwise the image would be blurry when printed.
- Under each banner, Billora shows its actual height on the PDF: a tall banner pushes the page content down by the same amount. Crop it as close as possible to your logo and text.
If an image is refused, the message is shown under the image concerned, with the expected format.
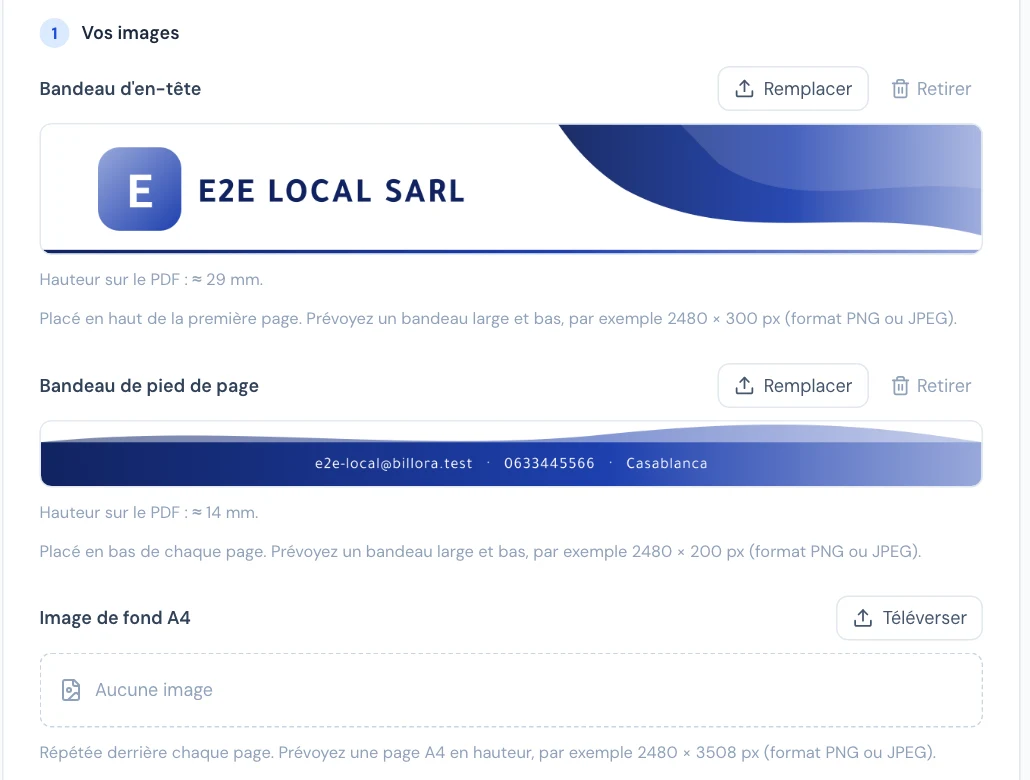 The three image slots. Under each banner, its actual height on the PDF (here about 29 mm and 14 mm).
No graphic designer? Use a ready-made template
At the top of the tab, the Modèles prêts à l'emploi (Ready-made templates) block offers four styles: Azur (curves), Émeraude (geometric), Prestige (dark) and Sobre (minimal). Choose a style, then:
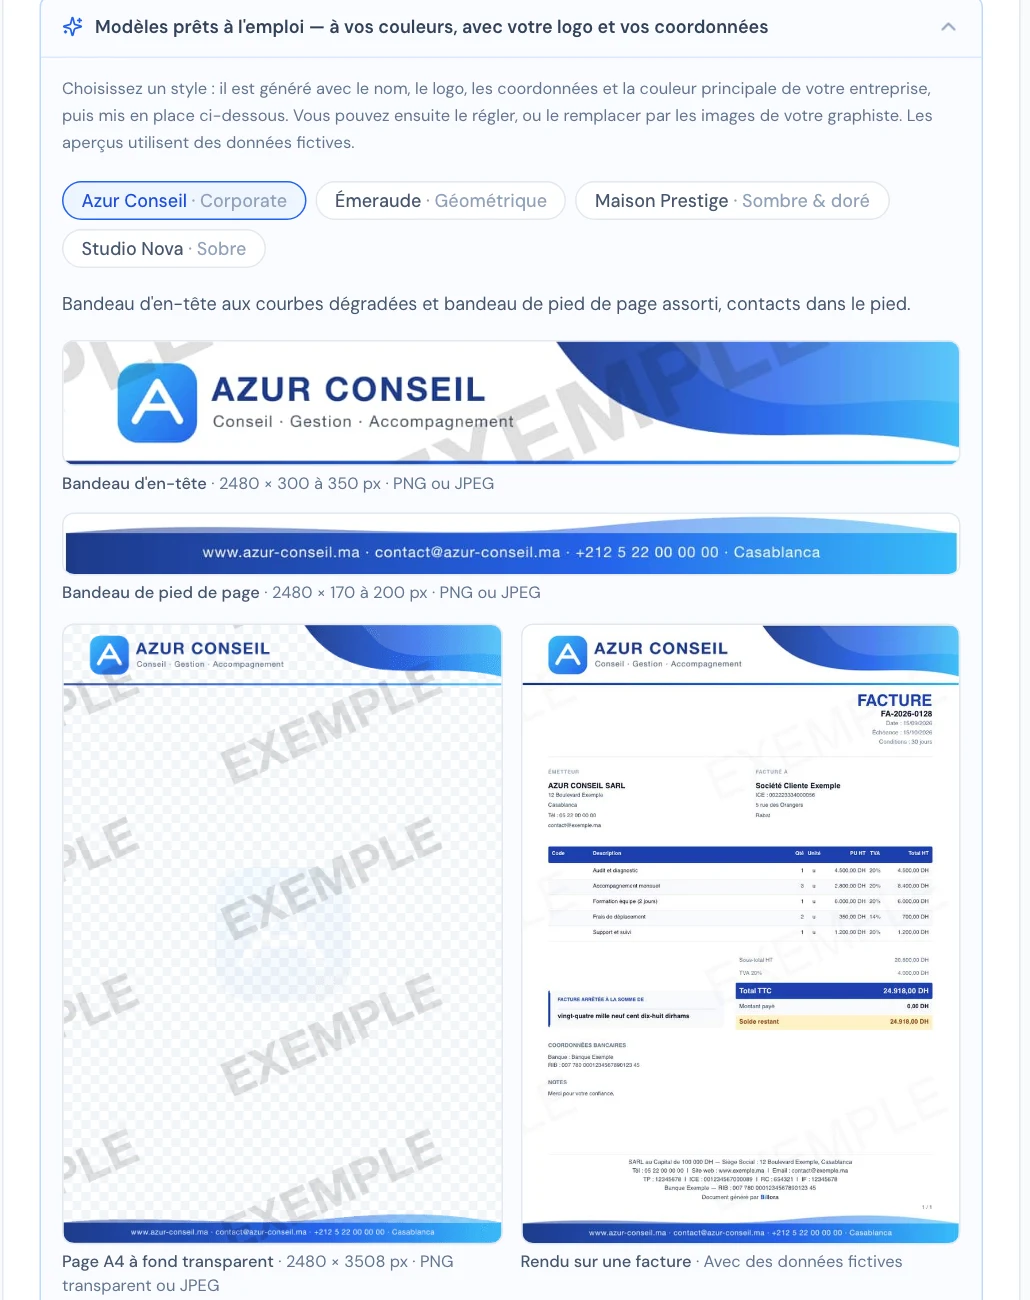 Choosing a style: the header banner, the footer banner, the A4 page with a transparent background and the result on an invoice (sample data).
- Select the variant: Bandeaux haut et bas (Top and bottom banners), or Page A4 entière (Full A4 page) with a transparent background.
- If you wish, enter a tagline or business activity.
- Click « Utiliser ce modèle » (Use this template).
Billora then draws the images with your name, your logo, your contact details (website, email, phone, city) and your company's main colour, and puts them in place. Check the preview, adjust if needed, then click Enregistrer (Save). You can replace them at any time with your graphic designer's images.
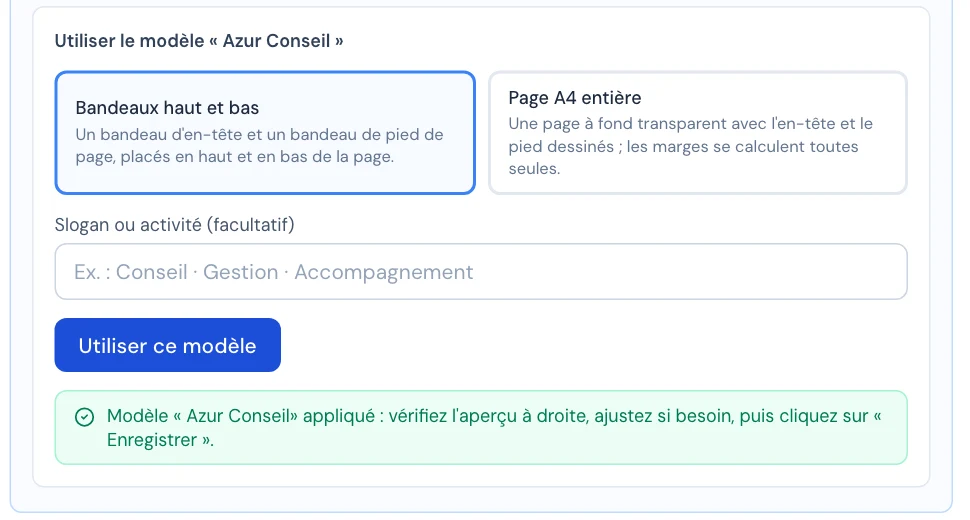 Variant (banners or full page), optional tagline, then « Utiliser ce modèle »: the images are generated with your data.
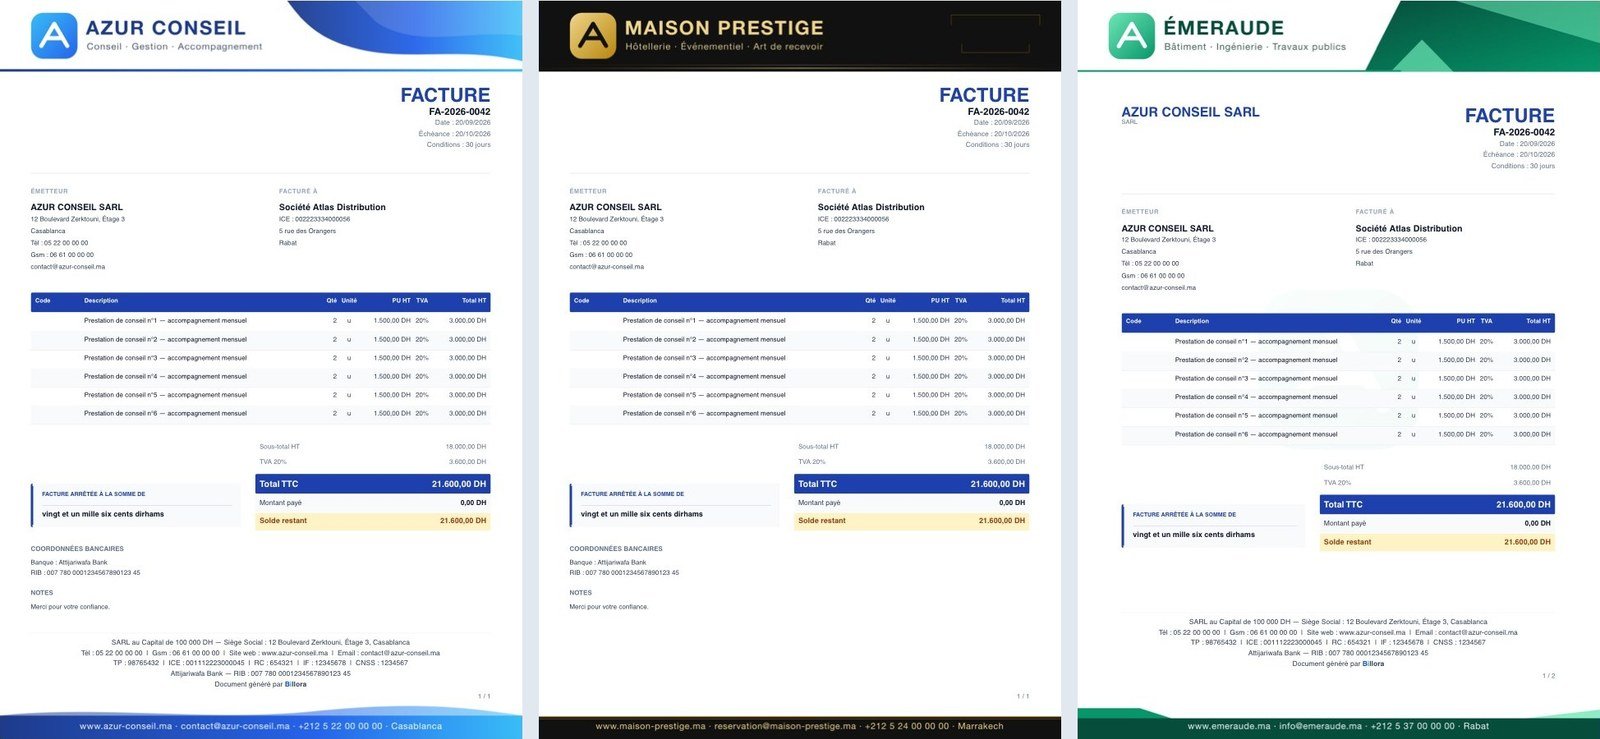 Three possible results: « Azur » banners, dark and gold « Prestige » banners, and « Émeraude » full page.
Step 2 — Header banner and overlay
- Répéter le bandeau sur toutes les pages (Repeat the banner on all pages): when unticked, the banner only appears on the first page and the following pages start higher up.
- Alignement vertical (Vertical alignment) (top, middle, bottom) of the overlaid block.
Step 3 — What is printed, and what your images already contain
To avoid duplicates, indicate what your image already carries:
- Imprimer le nom de mon entreprise dans l'en-tête (Print my company name in the header): untick if the image already displays the name. It is still shown in the document's "Issuer" block.
- Mon image contient déjà mon logo (My image already contains my logo): the company logo is no longer printed in addition.
- Mon image contient déjà mes mentions légales (My image already contains my legal mentions): the automatic footer is no longer printed. Use only if your image carries all the mandatory mentions.
- Superposer le nom, le titre, le numéro et les dates sur l'en-tête (Overlay the name, title, number and dates on the header): the text is placed on the banner (or in the top area of a background image); use it when that area is free. Tick Texte clair (Light text) for a dark background. If the block does not fit in the height of the header, it stays below: nothing is ever cropped.
Whatever your options, the number of the invoice (or quote, credit note…) always appears on the document.
Step 4 — Content margins
With a background image, leave the margins empty: the top and bottom margins are calculated automatically from the area taken up by your logo and contact details, so that the document text never runs over them. A value you enter (in millimetres) always takes priority.
As long as no image is present, all the settings in the tab are greyed out: they become active as soon as a banner, a footer or a background is in place.
4. The live preview and saving
On a wide enough screen, the preview appears on the right and refreshes about half a second after each change. It shows a real PDF with sample data, but with your logo, your contact details and your images. Choose the type of document displayed (invoice, quote, purchase order, delivery note, credit note) using the buttons above the preview, or open it full screen. On a phone, the « Afficher l'aperçu en direct » (Show the live preview) button opens it above the tabs.
The settings of the four tabs are saved together with the Enregistrer (Save) button at the bottom of the page.
Common problems
My image is refused
Check the format (PNG or JPEG), the width (at least 900 px) and the proportions: a banner must be much wider than tall, a background image must have the proportions of an A4 page. The message under the image gives the exact size expected.
The content runs under my logo or my contact details
With a background image, leave the margins empty for the automatic calculation, or enter them in millimetres. With a banner, check its height displayed under the image.
The overlaid title stays under the banner
The banner is too short to hold the name, title, number and dates (about 30 mm of height is needed). Make it taller, reduce the size of the name, or untick the overlay.
The text is unreadable on my banner
Tick or untick Texte clair (Light text) depending on the colour of your banner.
My name or my logo appears twice
Your image already contains it: tick Mon image contient déjà mon logo and untick Imprimer le nom de mon entreprise dans l'en-tête.
I don't see the « Papier à en-tête » tab enabled
The feature depends on your subscription. The tab indicates the plan from which it is available.
Was this article helpful?
Invoice compliantly, effortlessly
DGI-compliant invoices, quotes, credit notes, VAT and supplier tracking in a single tool.
Try it free